Two-factor authentication (2FA) is a security measure that requires two separate factors to gain access—something you know and something you have. While it’s still important to have a strong, unique password to make it harder to crack (‘something you know’), 2FA also incorporates a randomly generated six-digit code that gets sent to or synced with a device you trust like your personal cell phone (‘something you have’).
- What do I need?
- How do I enable 2FA on my email account?
- Logging in to Webmail with 2FA enabled
- Disabling 2FA
What do I need?
There are a few different ways to get the 2FA code. One of the most common is to use your smartphone with an authenticator app or to have the code sent via text. You can also use password management applications from your computer, like 1Password, to add a 2FA code. All of the options have pros and cons, but some are more severe than others. For example, the authenticator app would need to be disabled or replaced before resetting your phone, but in general, an authenticator app is considered more secure than a text message code which can be diverted to a different device.
Although there are many different authenticator apps that you can use, some authenticator apps that we recommend are:
- Google Authenticator | iOS | Android |
- FreeOTP (Redhat Fork of GoogleAuthenticator) | iOS | Android |
- 2 Steps Authenticator (Blackberry)
How do I enable 2FA on my email account?
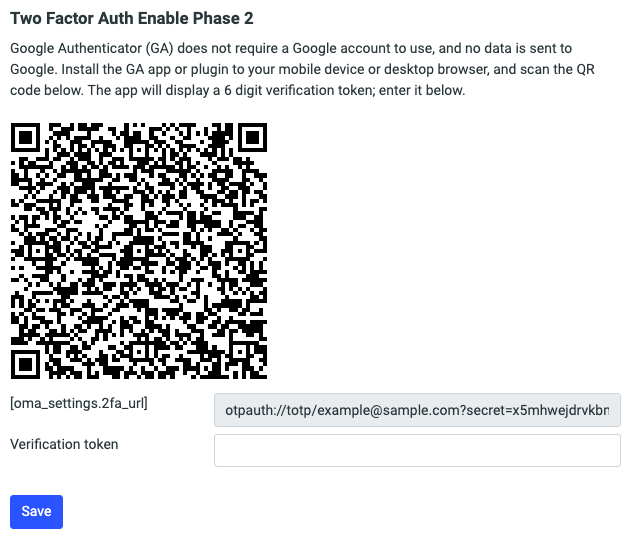
Using a Google authenticator
- Log in to your webmail.
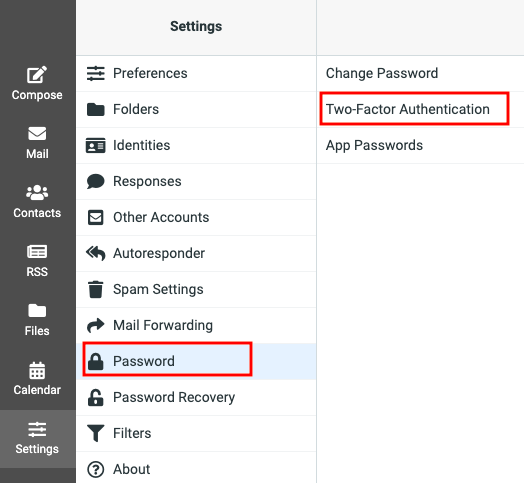
- Select Settings from the sidebar.
- From the left-hand menu, select Password then Two-factor authentication.
- Choose between setting up 2FA with an authenticator or with SMS text messaging.
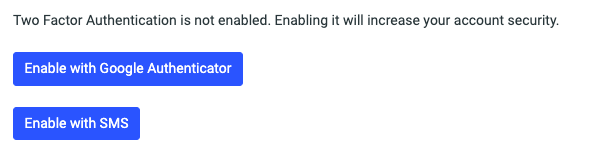
- Select Enable with Google Authenticator, and you will be asked to re-enter your password.
Note: Most authenticator apps operate using the same programming principle (TTOP) and can be used for 2FA.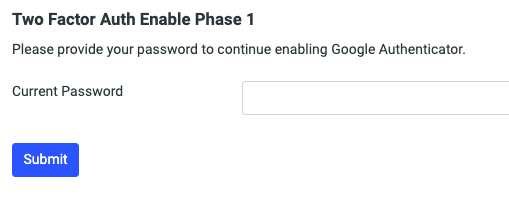
- Using your Google Authenticator, scan the QR code and enter in the six-digit code.
- You will be automatically logged out and when you log back in, two-factor authentication will be required. Your account is now protected by 2FA.
Using SMS messaging
- Log in to your webmail.
- Select Settings from the sidebar
- From the left-hand menu, select Password then Two-factor authentication.
- Choose between setting up 2FA with an authenticator or with SMS text messaging.
- Select Enable with SMS, and you will be asked to re-enter your email password and your phone number.
- Once you’ve received the SMS, enter the six-digit code.
- You will be automatically logged out and when you log back in, two-factor authentication will be required. Your account is now protected by 2FA.
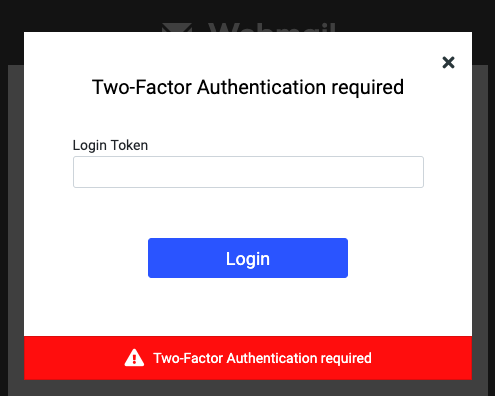
Logging in to Webmail with 2FA enabled
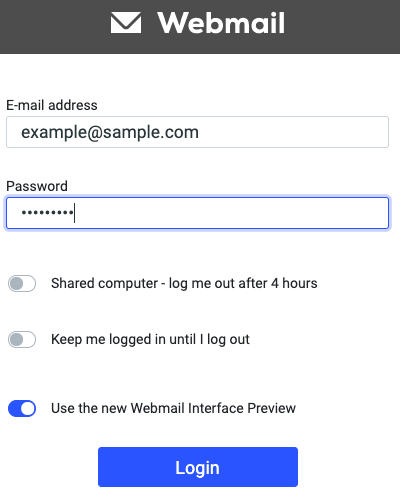
- Navigate to your webmail login.
- Enter your email address and password.
- Once 2FA is enabled, you’ll be prompted for the 2FA login token before being allowed access to your email.
Disabling 2FA
- Log in to your webmail.
- Select Settings from the sidebar.
- From the left-hand menu, select Password then Two-factor authentication
- Select Disable.

- Enter your current password and select Submit.

- Enter in your verification token from your SMS or Google Authenticator and click Submit.

- A confirmation message will appear in the lower corner, and you’ll be able to continue without 2FA enabled or set up a new 2FA device.
