To add your other POP Mail accounts in Zoho Mail, you need to check whether your Mail server supports the POP3 protocol for retrieving emails. If your Mail server supports POP access, you need to get the server details from your Administrator or service provider.
Incoming Server Details for Receiving Email:
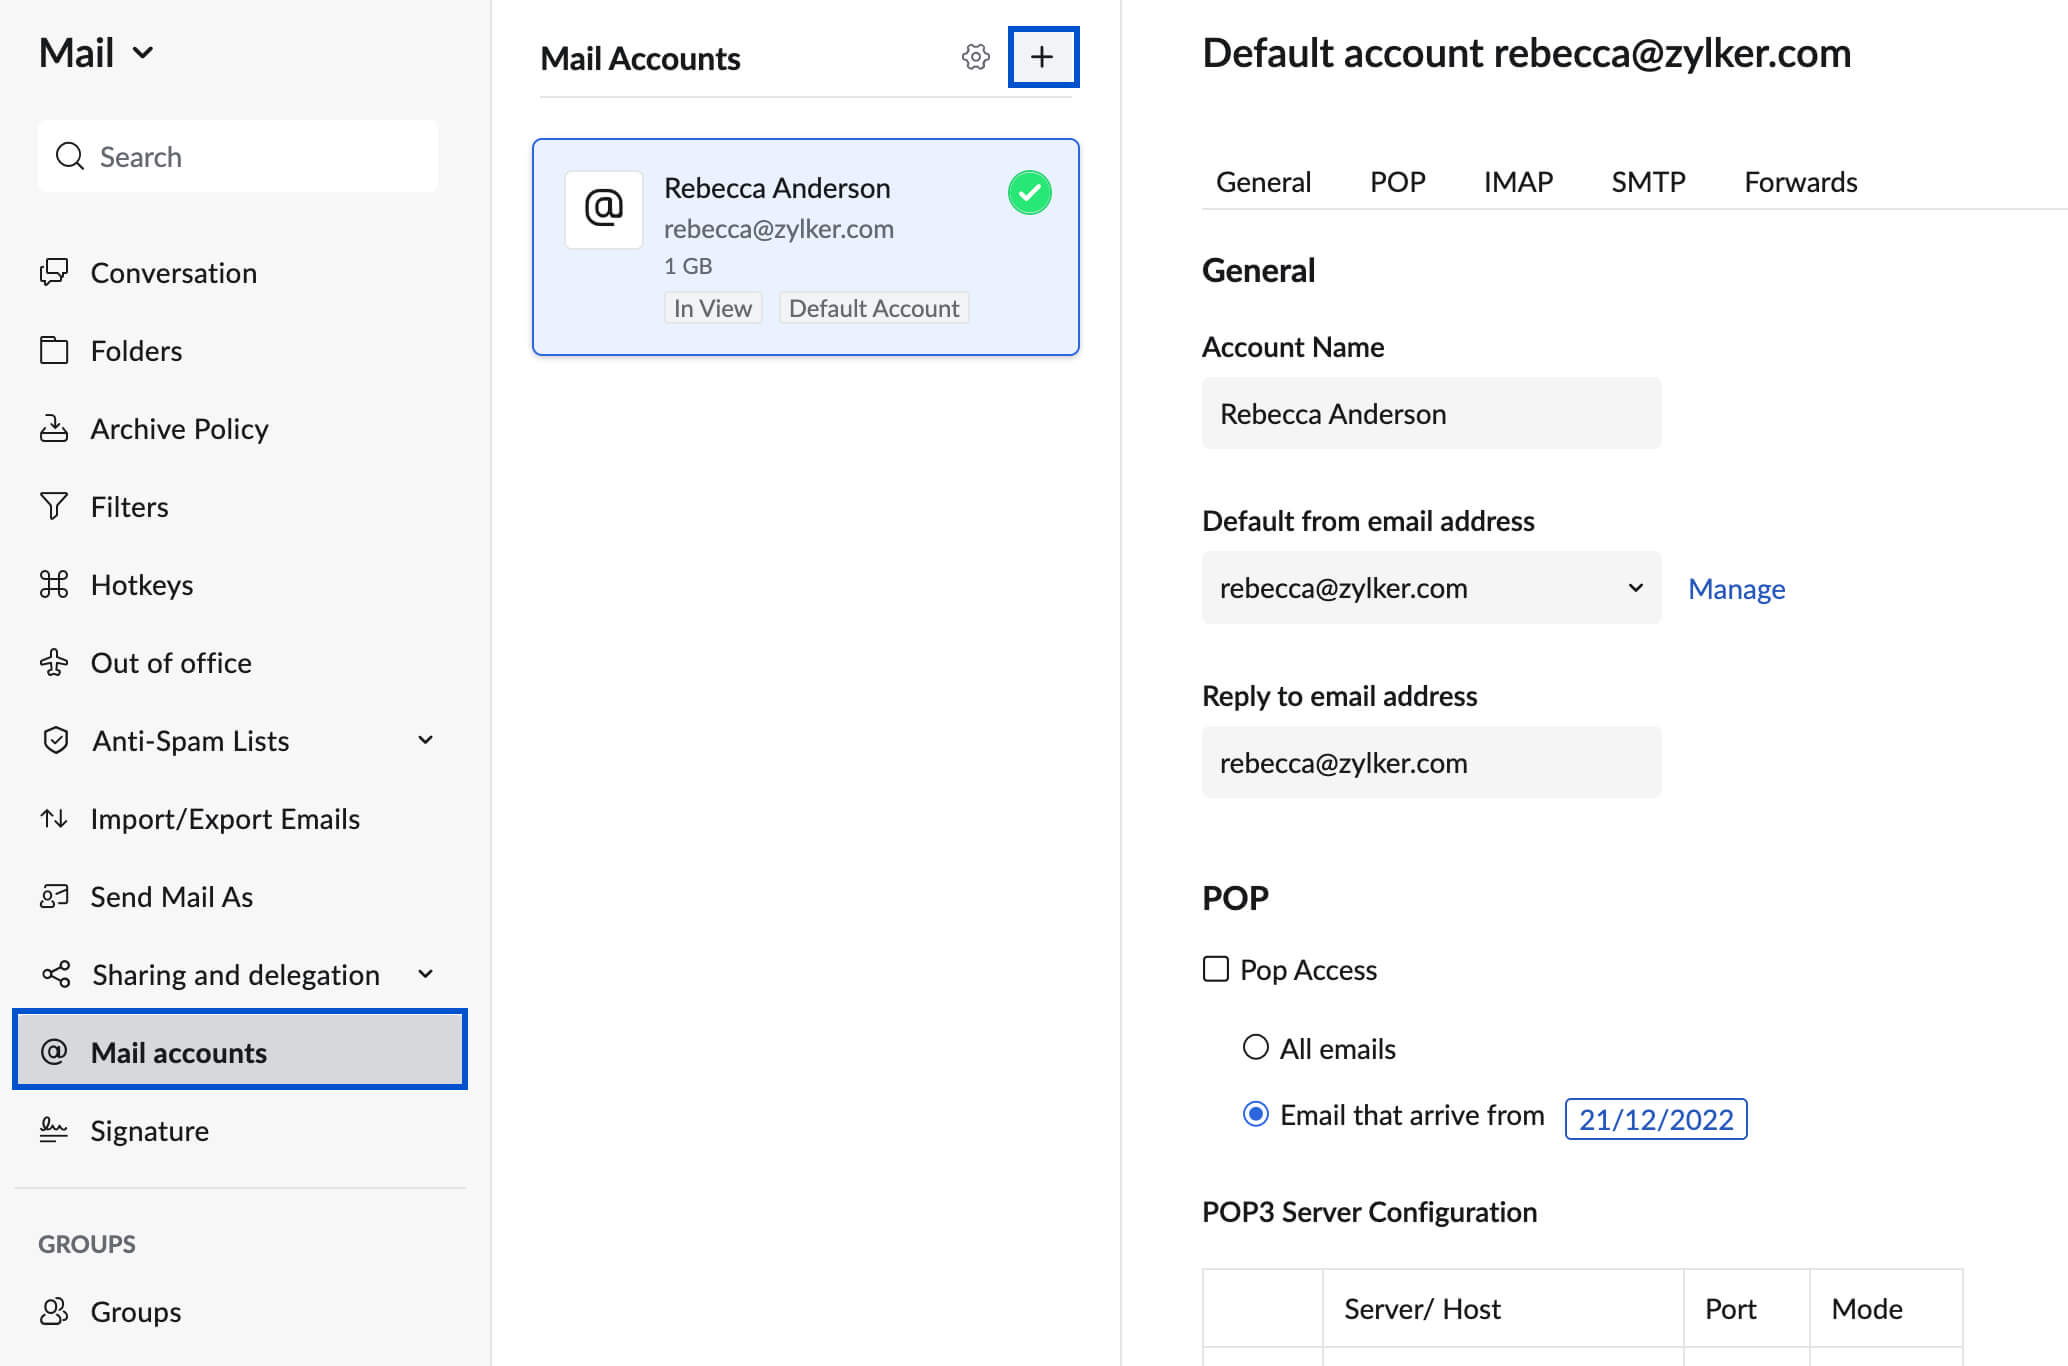
- Login to your Zoho Mail account.
- Go to Settings
- Navigate to Mail Accounts and click the + (Add account) icon.
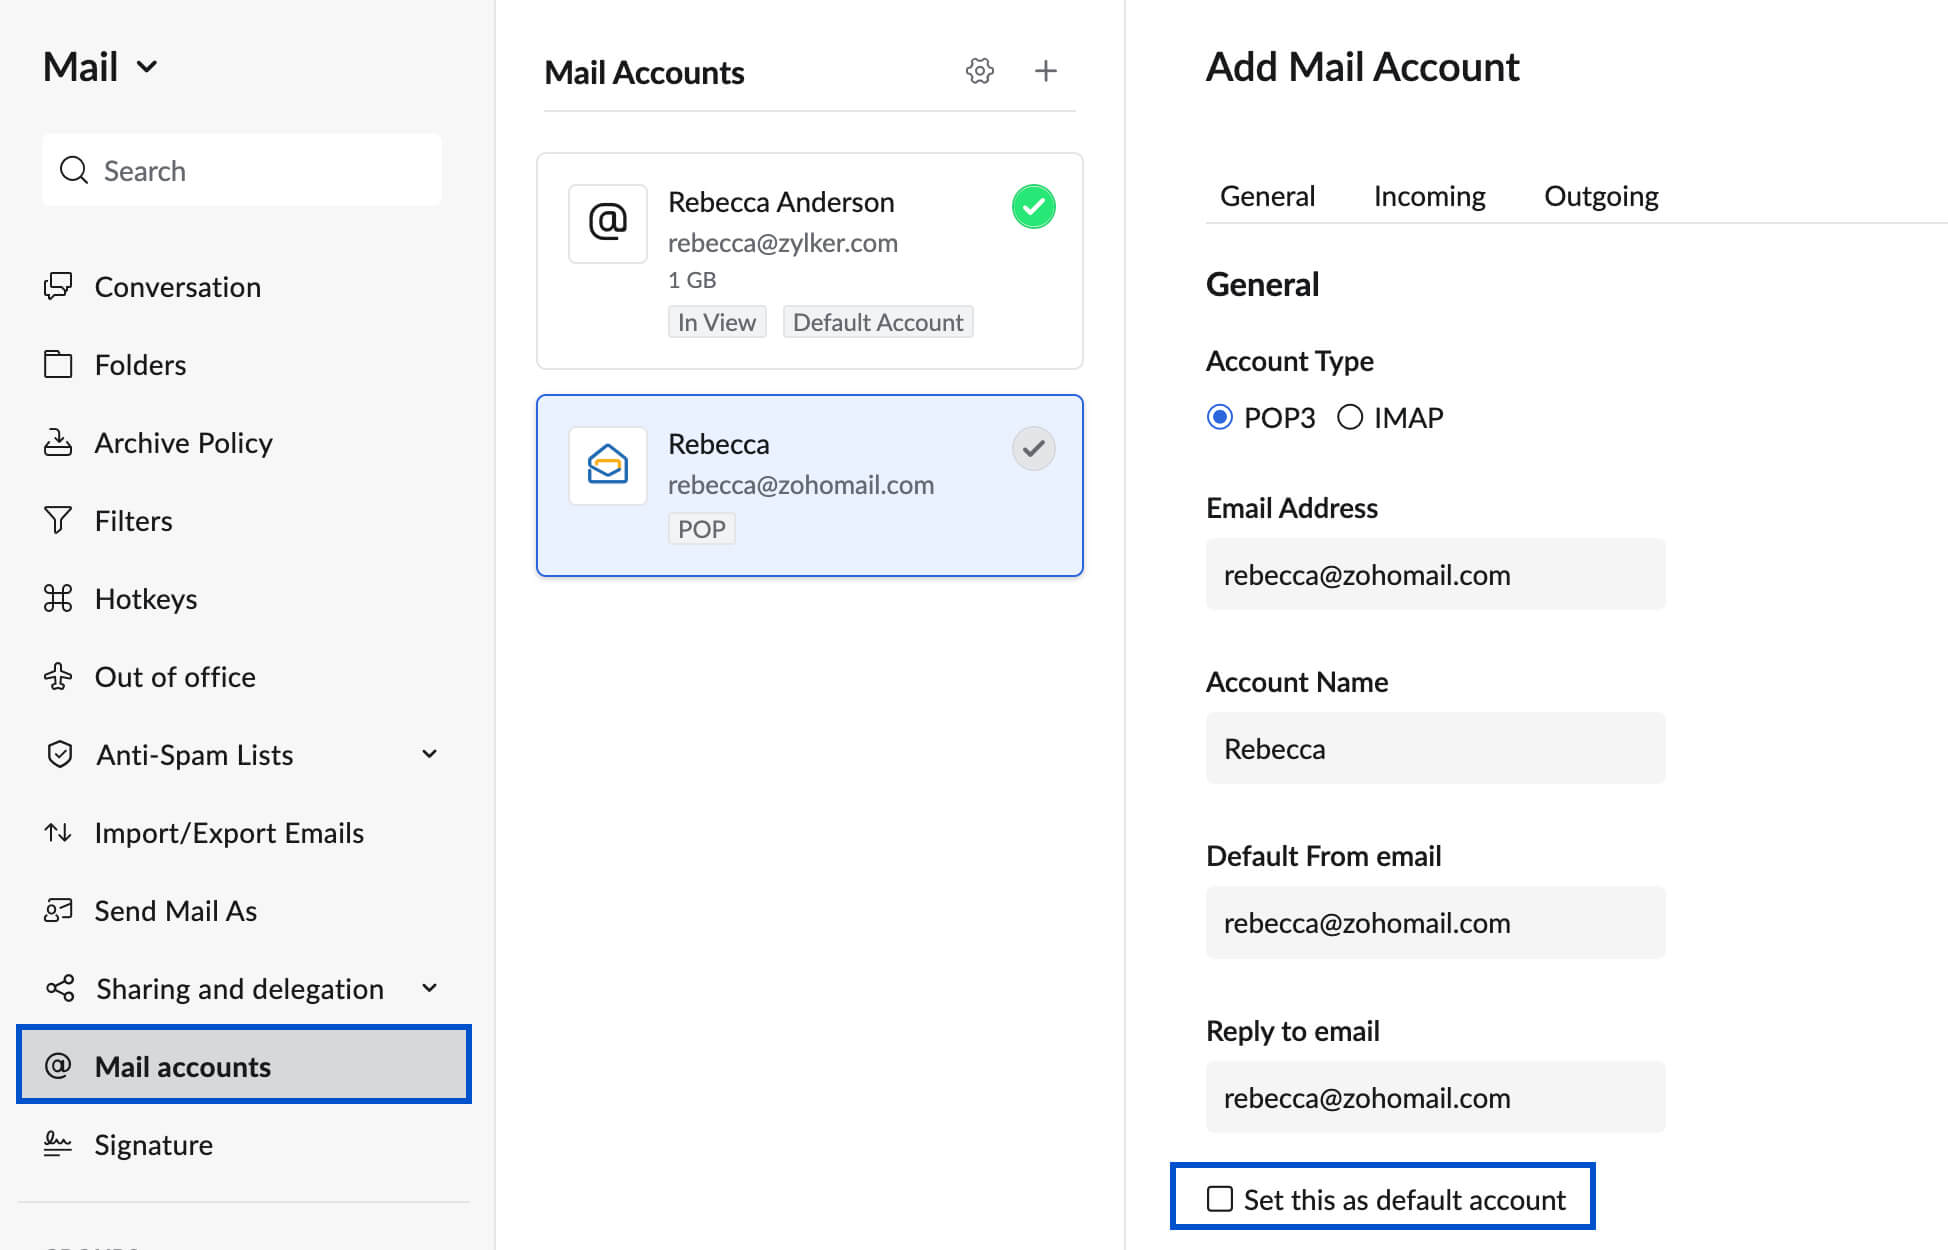
- Choose POP3 as the account type.
- Select your external mail account provider. If you want to configure Office 365 or Outlook accounts, follow the OAuth authentication method. Click Zoho if you want to configure another Zoho account and Others for any other service provider.

- Specify the Email address, Account Name, Default From email,& nbsp;and Reply to email for the Account.
- You can also set this to be your default address by checking the Set this as default account option.
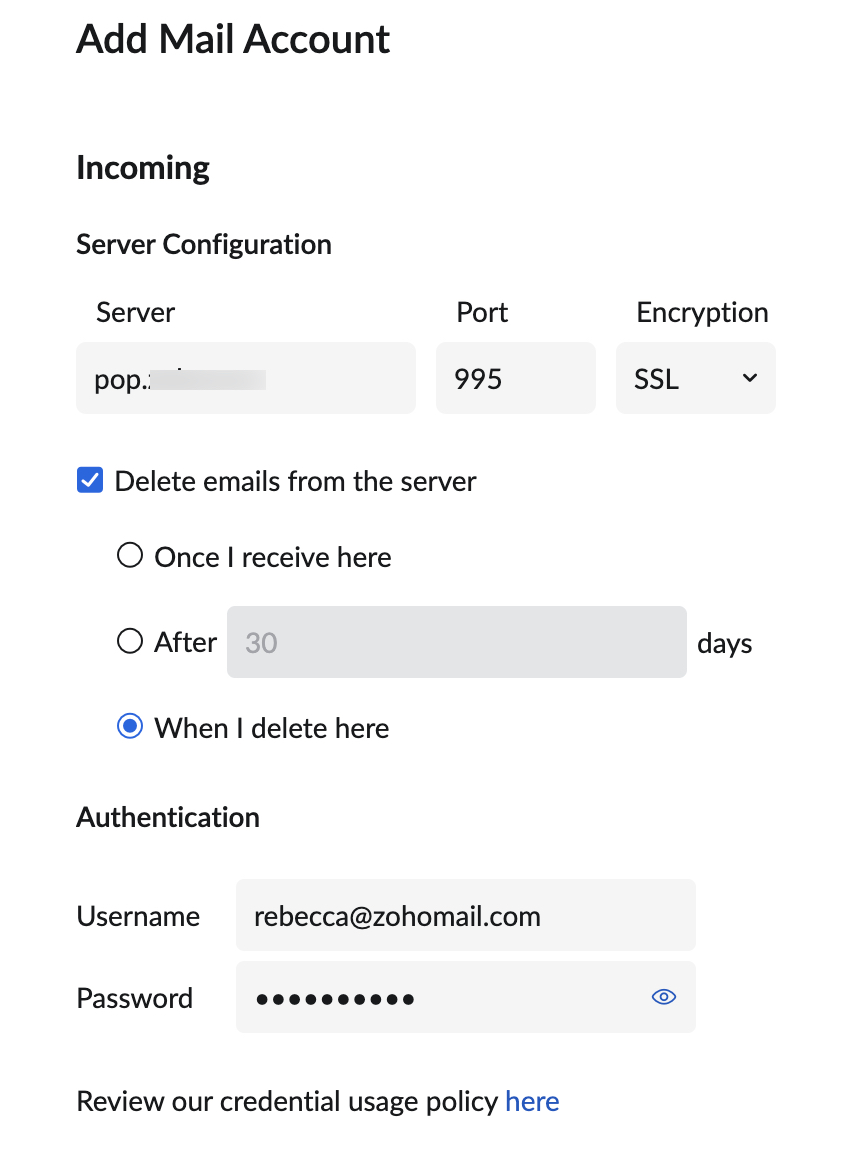
- In the incoming section, provide the POP3 Incoming server details and the Port number (Refer to your email service provider's Help documentation or support). Zoho Mail supports standard ports 110 and 995 for the Incoming server.
- You can select the Encryption type to be SSL or Plain, depending on your requirement. We do not support servers with self-signed certificates.
- Specify the User name and Password for the account, used in your email service provider's server.
- Check the option Delete emails from the server to delete emails from the server based on your requirement. The deletion provided in the option works based on your Mail server behavior. Check with your Email service provider before you set this option.
- Make sure you update the 'Password' details in Zoho if you change it in the actual account. If you fail to do so, the account will be disabled and you need to update the 'Password' and enable it. Once the Test Account succeeds, you will see the section to update your Outgoing Mail server details for sending email from the account.
-
Outgoing Server Details for Sending Email
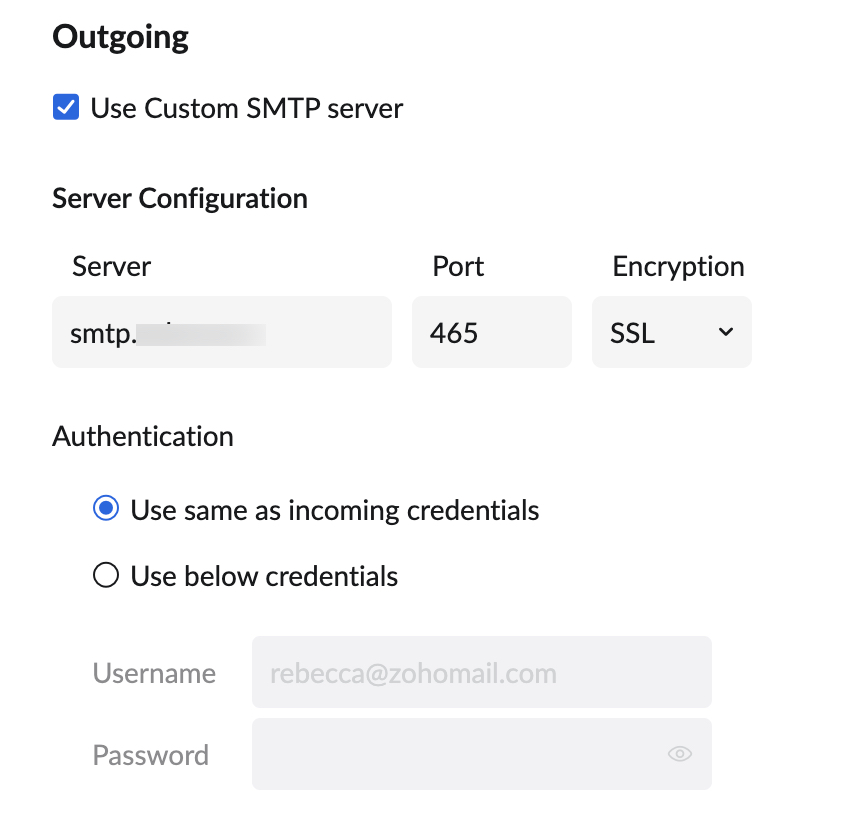
- After the Incoming POP server details are successfully verified, you will be prompted to enter Outgoing SMTP server details.
- Check Use Custom SMTP server option if you want to send an email via the Custom SMTP server. You may refer here for detailed information regarding adding Outgoing servers.
- In the Authentication section, you can select either Use same as incoming credentials or Use below credentials.
- Once done, click Save.
- Once both Incoming and Outgoing server details have been verified successfully, the account will be listed in the POP Accounts page. If the Outgoing server details could not be authenticated directly, you will receive a verification email to the address provided. Only after the verification, you will be able to send emails using that particular email address.
